Blood
Glucose
Monitoring
System
IMPORTANT: Read detailed
instructions and other important
information in your owner’s booklet.
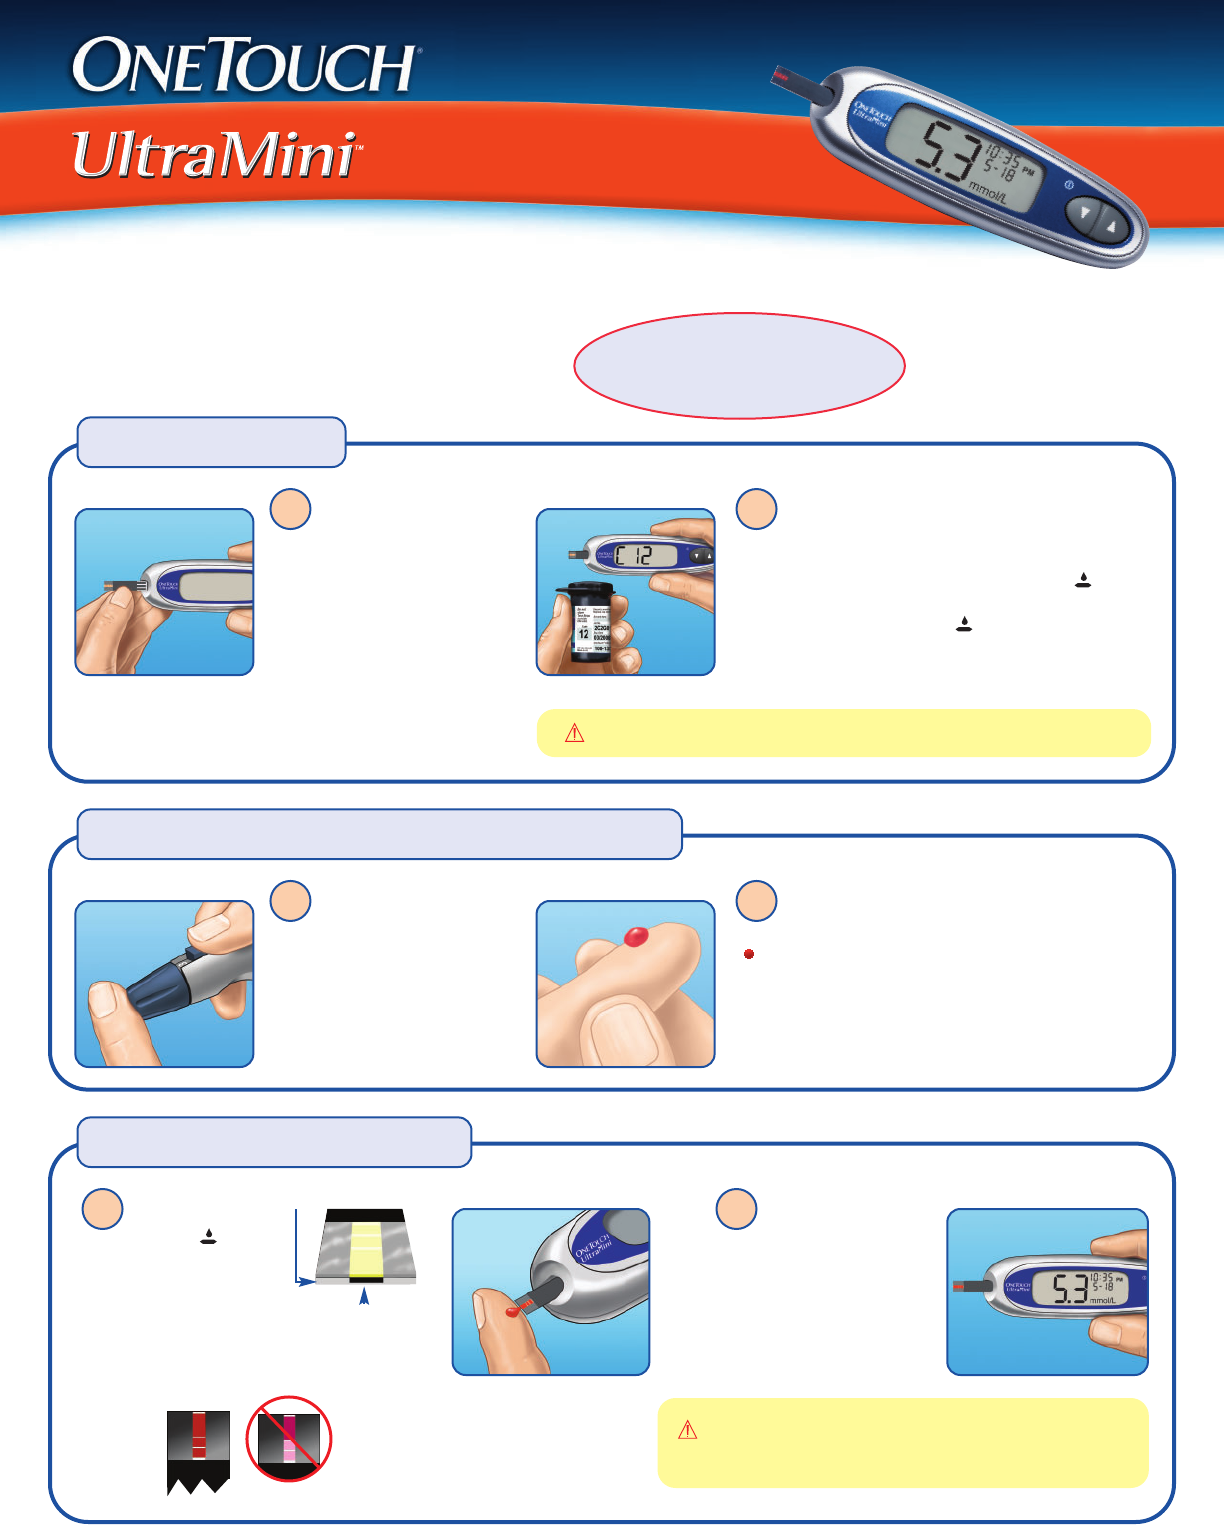
Insert a test strip into
the test port as shown. The
three contact bars should be
facing you. The meter will turn
on and display the code from
your last test. If you are using
the meter for the first time,
a constant
C
and a flashing
“——” appears instead of a
code.
If the code on the meter does not match the code
on the test strip vial, press ▲ or ▼ to match the code
number on the test strip vial. The display will then advance
to the screen with the flashing blood drop icon .
If the flashing blood drop icon appears before you are
sure the codes match, remove the test strip and re-start
from step 1.
CAUTION: This step is essential to obtain accurate results.
WARNING: If mmol/L does not appear with the test result,
call the OneTouch
®
Customer Care Line at 1 800 663-5521.
1 2
Coding the meter
Hold the OneTouch
®
Lancing Device cap firmly
against the side of your finger.
Press the release button.
Remove the OneTouch
®
Lancing
Device from your finger.
Gently squeeze and/or massage your fingertip
until a round drop of blood of at least one microlitre
( actual size) forms on your fingertip.
1 2
Getting a blood sample from your fingertip
When the flashing
blood drop icon
appears, touch and hold
the drop of blood to the
narrow channel in the
top edge of the test strip
until the confirmation
window is full.
If your sample does not fill the
confirmation window on the first try,
do not add more blood to that strip.
Instead, test again with a new strip.
After the meter counts
down from 5 to 1, your blood
glucose level appears on the
display along with the unit of
measure, and the date and
time of the test.
1 2
Applying the blood sample
Top edge
Narrow channel
Apply drop here
Abbreviated Procedure Guide
33716 OTUMini APG 088861A E 7/3/07 2:55 PM Page 1
