


Part No. 1090132 Rev F 59 Invacare Scooters
OPTIONS/REPLACEMENT PARTS PROCEDURE 11
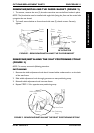
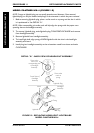
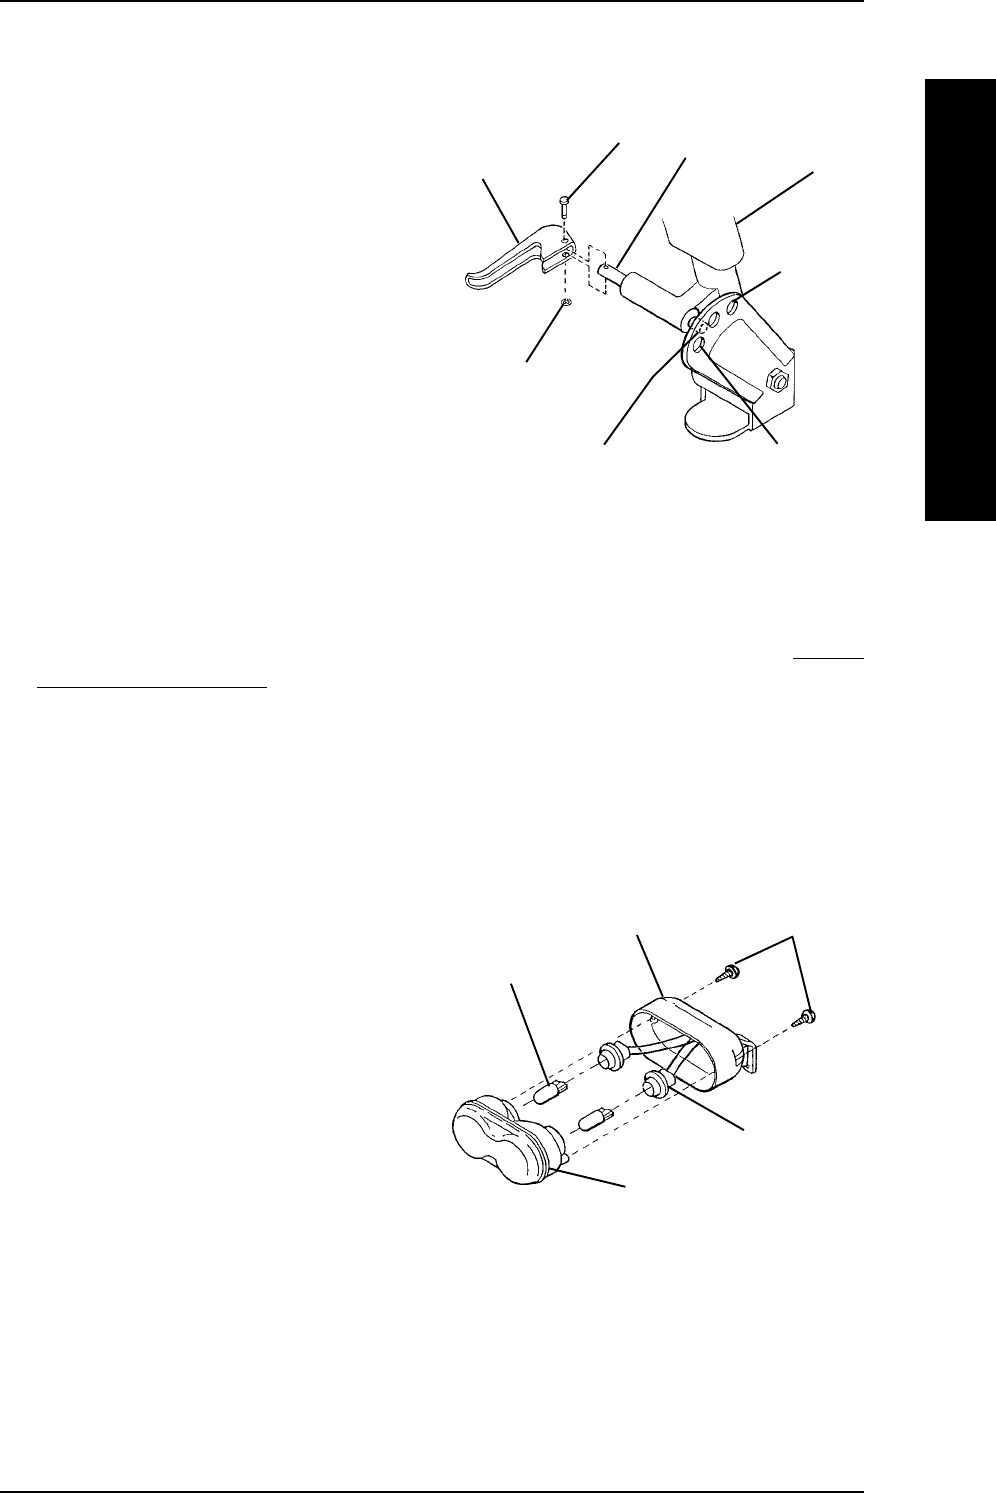
REPLACING TILLER ANGLE ADJUSTMENT LEVER
(FIGURE 8)
NOTE: The tiller angle adjustment lever is
NOT available on ZOOM-3.
1. Adjust the tiller so that the position of
the tiller is in-between adjustment
holes.
NOTE: This adjustment allows the plunger to
be fixed in the fully extended position.
2. Remove the retaining ring.
3. Remove the pin that secures the
adjustment lever in place.
4. Remove the adjustment lever from the
plunger.
5. Install NEW adjustment lever onto
plunger.
6. Install pin through adjustment lever and plunger and secure in place with retaining ring.
7. Adjust tiller to one (1) of the three (3), or five (5) adjustment holes. Refer to
TILLER
ANGLE ADJUSTMENT in PROCEDURE 8 of this manual.
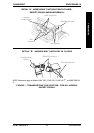
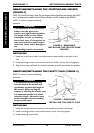
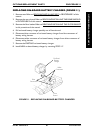
REPLACING HEADLIGHT LIGHTBULBS
MODELS LYNX LX-3 AND PANTHER LX-4 (FIGURE 9)
1. Remove the two (2) mounting screws that secure the headlight assembly to the
housing.
2. Remove the plug from the headlight
assembly.
3. Remove the EXISTING lightbulb from
the plug.
4. Install the NEW lightbulb into the plug.
5. Reinstall plug into headlight assembly.
6. Resecure headlight assembly to the
housing with EXISTING mounting
screws. Securely tighten.
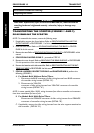
FIGURE 8 - REPLACING TILLER
ANGLE ADJUSTMENT LEVER
Seat
Lever
Plunger
Pin
Retaining
Ring
Tiller
Adjustment
Holes
Position tiller in-between
adjustment holes
(STEP 1)
Adjustment
Holes
OPTIONS/REPLACEMENT PARTS
Mounting Screws
Headlight Assembly
Plug
Lightbulb
LYNX LX-3 AND PANTHER LX-4
FIGURE 9 - REPLACING
HEADLIGHT LIGHTBULBS
MODELS LYNX LX-3 AND
PANTHER LX-4
Housing