


1
MODEL PRODUCT USED ON
6312 Deluxe\Vinyl padded Shower Chair
6314 Transfer Bench
6316 Next Generation Shower Chair
6318 Economy Transfer Bench
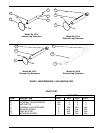
FIGURE 2 - REMOVING THE EXISTIING LEG
EXTENSIONS
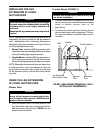
ASSEMBLY OF THE LEG
EXTENSIONS W/3-INCH
SUCTION CUPS (FIGURE 1)
1. Screw the stem of the NEW suction cups into the
NEW threaded leg inserts.
FIGURE 1 - ASSEMBLY OF THE LEG
EXTENSIONS W/ 3-INCH SUCTION CUPS
SAFETY SUMMARY
The following recommendations are made for the safe
installation and operation of the Leg Extensions w/3-
inch Suction Cups:
WARNING
DO NOT install this equipment without first reading
and understanding this instruction sheet. If you are
unable to understand the Warnings, Cautions, and
Instructions, contact your Invacare dealer or
Invacare Account Services at 1-800-333-6900
before attempting to install this equipment - oth-
erwise, injury or damage may occur.
Check ALL parts for shipping damage. In case of
shipping damage, DO NOT use.Contact
Carrier/Dealer for further instruction.
Ensure that ALL parts are tight at all times.
Make sure that the snap buttons protrude through
the same respective adjustment hole of each leg
extension and an even height adjustment is
achieved.
Ensure that the leg extensions are securely locked
in place.
Check suction cups for rips, tears, cracks or wear.
If any of these conditions exist, replace suction
cups immediately.
For transfer bench use, the bathtub floor should
be dry and free of dirt, oils etc. before using. Both
suction cups MUST be in contact with tub floor at
all times.
Users with limited physical capabilities should be
supervised or assisted when using the transfer
bench.
Follow ALL Warnings and/or Cautions applicable
to the product the Leg Extensions are used with.
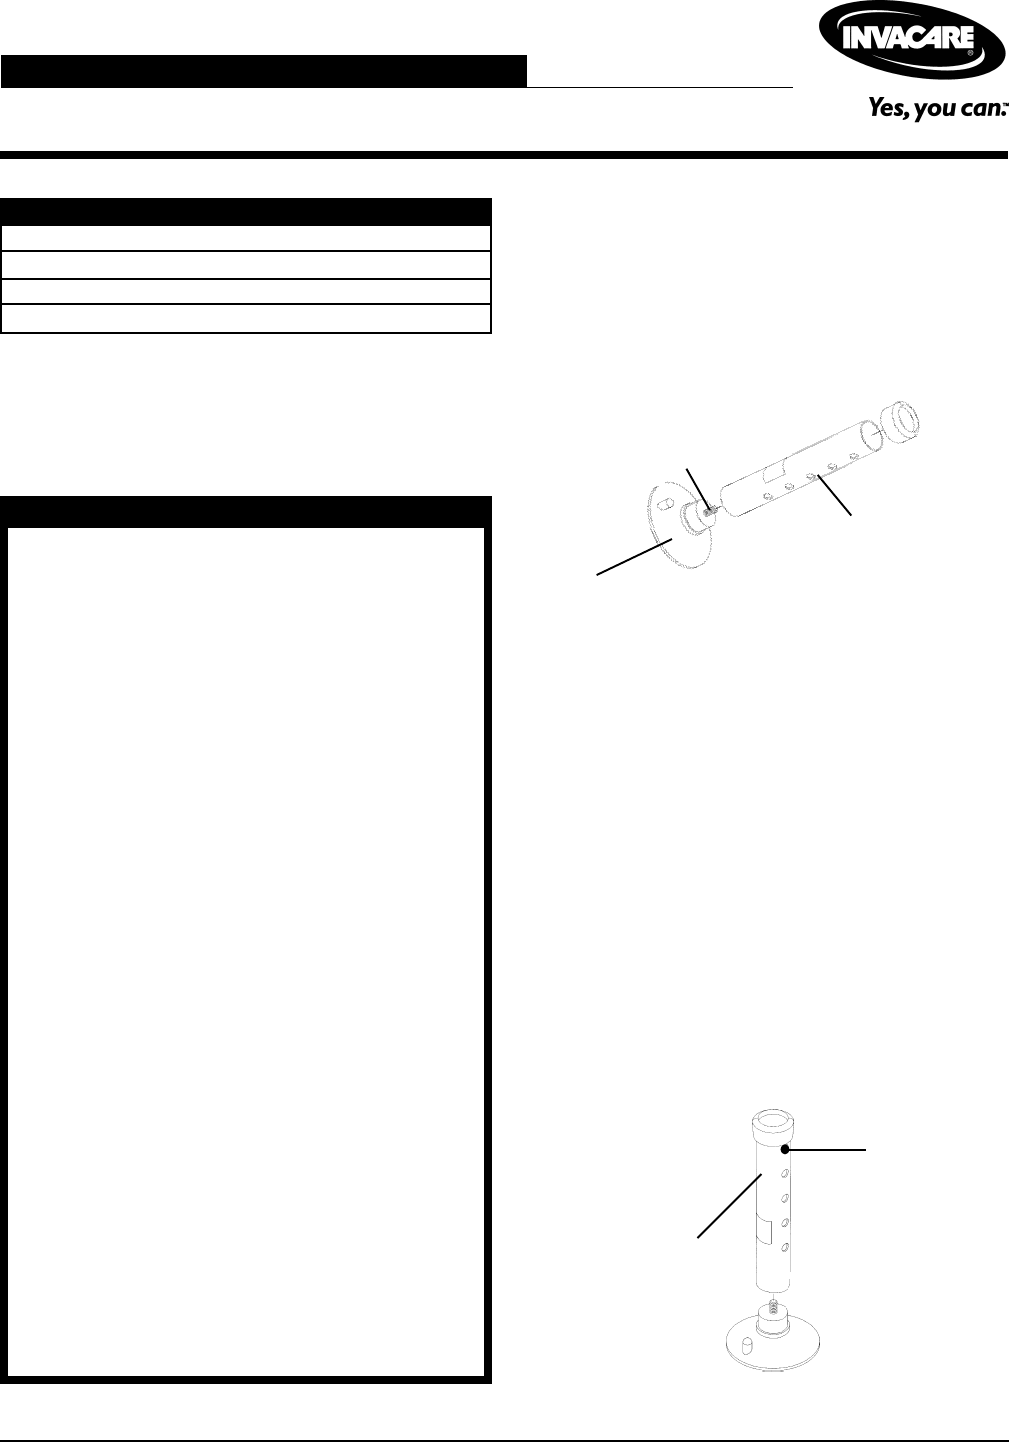
Leg Extension
Stem
Suction Cup
Leg Extension
Snap Button
REMOVING THE EXISTING LEG
EXTENSIONS (FIGURE 2)
1. Shower Chair: Depress the snap button and remove
the existing leg extension. Repeat for all four (4) legs.
2. Transfer Bench: Depress the snap buttons and re-
move the existing leg extensions that are located on
the side of the seat arm.
NOTE: The following illustration represents the exter-
nal leg extension found on the shower chair and/or
the transfer bench. The internal leg extension, found
on the Deluxe/Vinyl padded shower chair, removes in
the same manner.
Leg Extensions w/3-inch Suction Cups
Assembly, Installation and Operating Instructions
Model No. 6312 - Internal Extension
Model Nos. 6314, 6316, 6318 - External Extension